Planning a trip to Goa? Bought all the cute lacey bralettes and bikinis? Now let us remind you of the unruly mane on your body. Unwaxed bushes are ...
5 min read
Share


Planning a trip to Goa? Bought all the cute lacey bralettes and bikinis? Now let us remind you of the unruly mane on your body. Unwaxed bushes are a nightmare for a girl on a holiday! Not only will they make you utterly uncomfortable in your swim or beach wear, but they will also cause a lot of embarrassment. To save you from all of that, we recommend you try our DIY Brazilian Waxing Guide
Now that you have decided to beautify every inch of your body all by yourself, select the wax accordingly. You can choose from hard wax to specific soft wax made for that area of your body. Just make sure that you buy the ones which spell out the distinction of melting them.Few are meant only for microwaving and few are meant only to be used with a wax warmer. Again, try them both!
Once you are done finding the right wax, your focus needs to shift to the other ancillary tools that will employ the waxing procedure. These include:
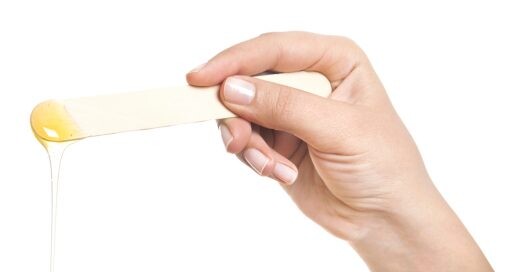
Buy the ones made of wood. Plastic or metal will conduct the heat of the wax and might even burn you. Buying the large and slanted ones will ensure maximum application in one go.
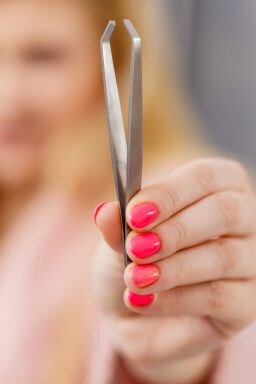
These will help you to pull out the little leftover hair here and there.
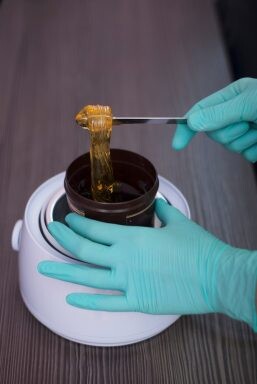
We have all been guilty of trying to melt wax on heaters, shallow melting it and even direct heating it or even microwaving it. It’s time that you invest in a proper wax warmer. This will not only avert the possibilities of grotesque tragedies but will also keep your wax balmy while you use it.
The hair you aim for in a Brazilian waxing is the Pubic hair. Now, make sure that the hair is as long as 1/4th of an inch. Shorter than this, the wax will not be able to catch hold of the hair and might end up giving you 2nd-degree burns or even peel off your epidermis (ouch!). On the other hand, if the hair is longer, you will be drowning in major pain as the hair might get curled, knotted with other hairs or get unruly which will give you very less to control upon. The tip is to trim the hair to the right length. Either use a pubic hair scissor or an electric trimmer.
Once the hair has grown to the desired length, start by cleaning the area of waxing. Use mild soaps to clean that area. If you want a little more cleanliness, You can use a vaginal wash and clean the area. Now pat dry the crotch. It is important to clean it well to remove any dirt or knotted hair down south for a smooth waxing session. You might even resort to isopropyl alcohol-based sanitizers which will evaporate eliminating the need to dry. This cleaning will help the wax to stand well.
Before you go for your first batch of waxing, take the heated wax with a popsicle and smear it on your wrist to check. You will now know the heat of the wax and can either let it sit for a while to cool it down or even heat it a little more. This again amounts to a lot of experimentation to hit the right chord with the temperature for an efficient waxing. Use the temperature indicator in the wax warmer and know what fits you the best.

We suggest you compartmentalize the part of your skin for waxing it effectively. Our pro tip is you start with your inner thighs and work your way in and back. The thickness is optional but again the consistency should be as thick as the peanut butter you spread on your bread. Each smear should be about an inch wide and three inches long. Ensure that you apply the wax in the direction of the hair growth. Now, wait for about 30 seconds for the wax to settle. After that, the wax should essentially turn into plastic. You should be able to hear a slight harness when you tap it with your fingernail. Now rip it off your skin swift and quick.
Nothing in this world comes without pain, so does inner skin beauty. The only thing we can tell you is to spread the skin beneath the wax and hold it taut, this might reduce some pain. Now, on the count of three, think of your happy place and rip the wax off in the opposite direction. You might think there are other ways to do this but this is the only way. But once you are done with it the end result will be a butter soft skin that you can flaunt!
The back region doesn’t hurt much because the skin is taut with some skeletal framework. But your labia and the hood of your vagina are bound to give you some excruciating pain. The easiest way to do it is to pull off the strip quickly and use a cooling pad immediately on the waxed surface to reduce the pain.
Some pieces of wax might get stuck in your folds, there are wax removers you can buy to remove these. Use ice cubes to alleviate the burning sensation and exfoliate with body scrubs to ensure no ingrown hairs pop-up. Moisturize the area of impact.
We do understand that Brazilian waxes can cause a bit of pain. But Scissoring the place might cause grievous damage to your sensitive inner parts and we all know the regrowth and double hair growth horrors of shaving. So, embrace Brazilian waxing as soon as you can to be accustomed to the pain and reward yourself with a flawless body.


Subscribe to our newsletter